The past 3 months since we released our demo has been a constant review of feedback and comments from our players. We’ve seen all the bugs and issues that were pointed out and we’re coming up with an updated demo that drastically improves the game’s experience. Along with the issues, we also received some questions and suggestions on a few impressive things in our build, so we would like to thank everyone who tried our demo and gave feedback!
Also since we showcased our game at Dreamhack Anaheim back in February, we received some queries on how we were able to create our Main Menu. So we thought of writing this detailed tutorial to share our experience.
The process took 2 parts: developing the shader, and animating other elements on screen.

Shader Development
Developing the “Main Menu” involved a lot of mix-and-matching on which textures will produce the best desired effect. It’s basically just overlaying and masking textures on top of each other.
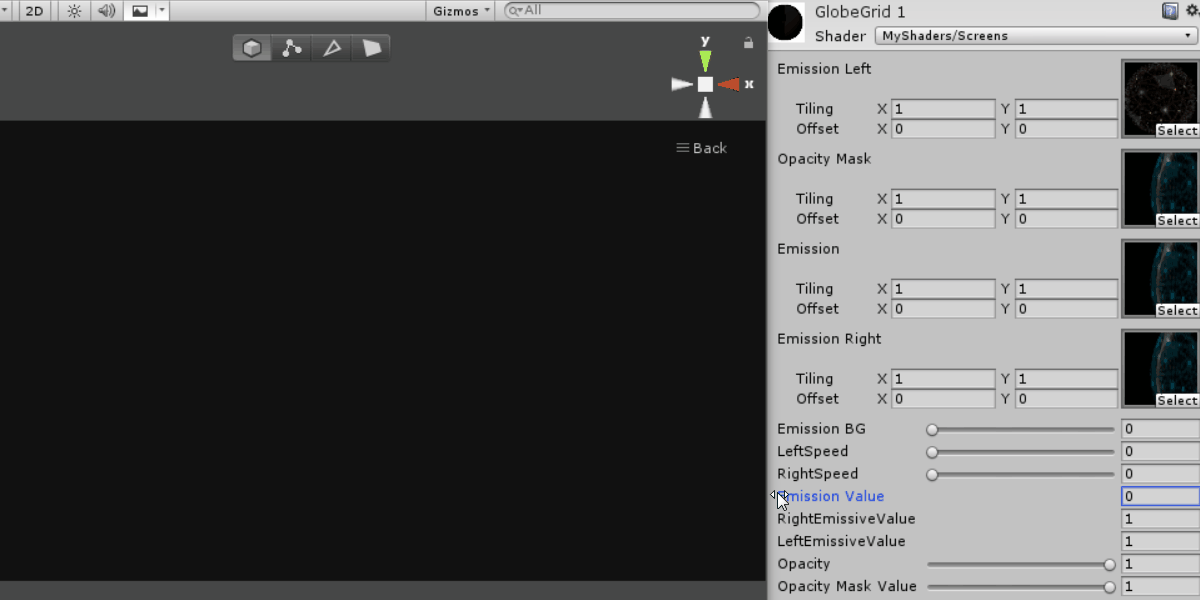
We used the Amplify Shader Editor plug-in to develop this effect but the same concepts can be applied with any node-based shader editor available. The shader graph we designed could be simpler, but we wanted to provide more flexibility so that we can use the same shader to create different kinds of VFX for our game. Knowing this, we exposed a lot of properties in our graph so our artists and developers can tweak the settings in the material inspector without having to edit the shader itself.
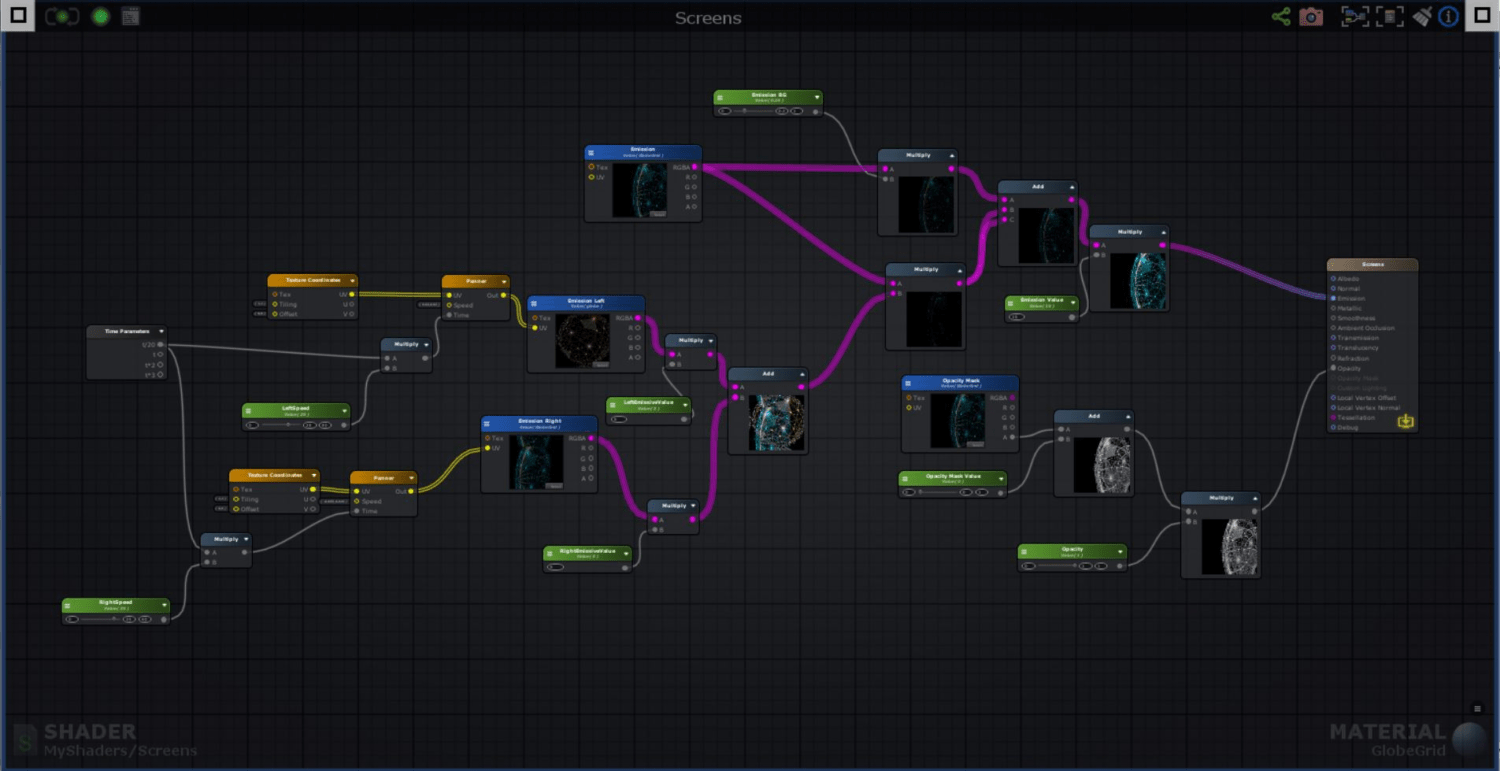
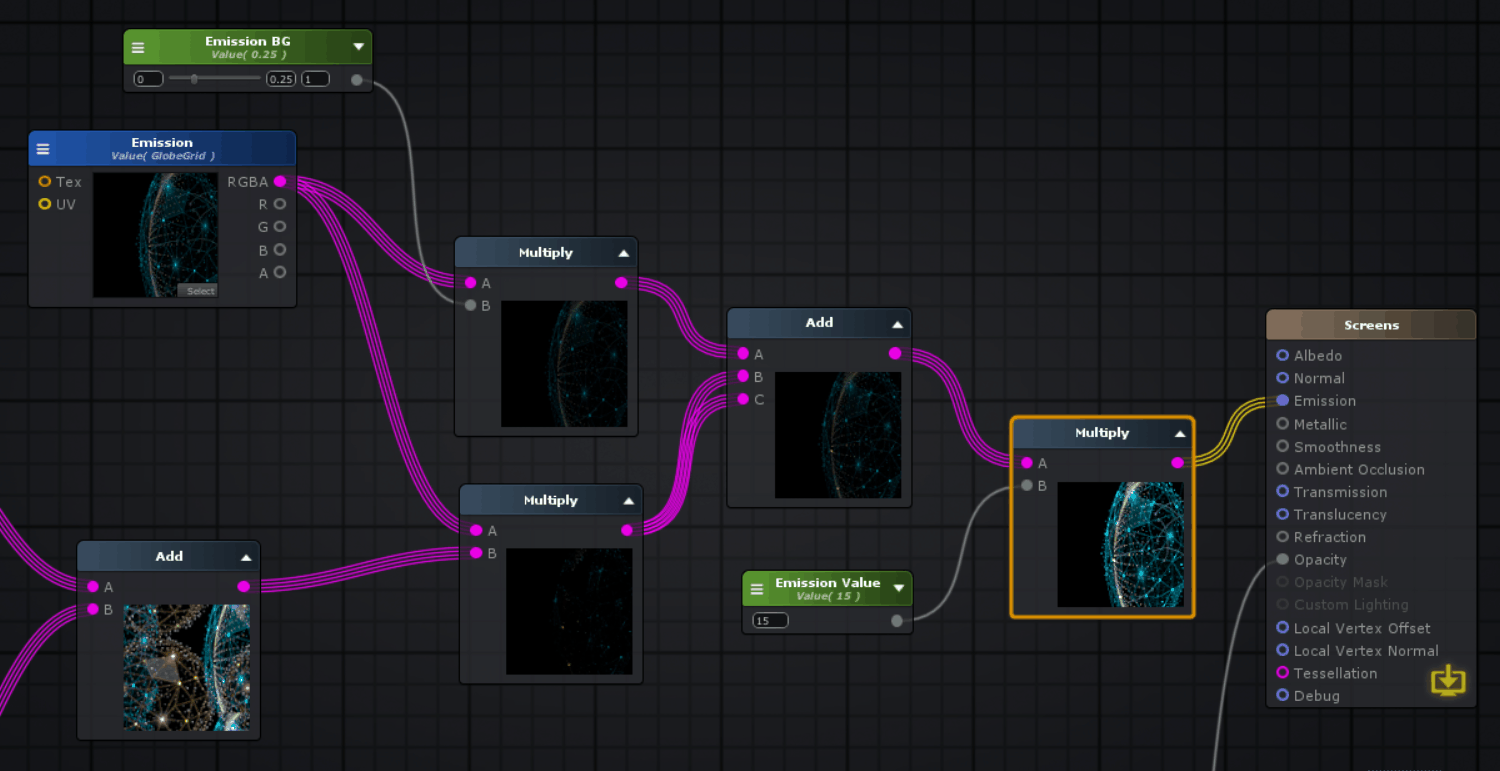
We chose the image of the globe grid as the main emission layer, since the grid would represent the mask layer that achieves the effect of moving current along the grid lines. Note that as an image mask, this also meant that the background color had to be pure black.

We then chose 2 textures (Emission Left and Emission Right) that will create the “moving current effect” on the globe. We panned 1 texture towards the left and the other towards the right and overlayed them on top of each other.
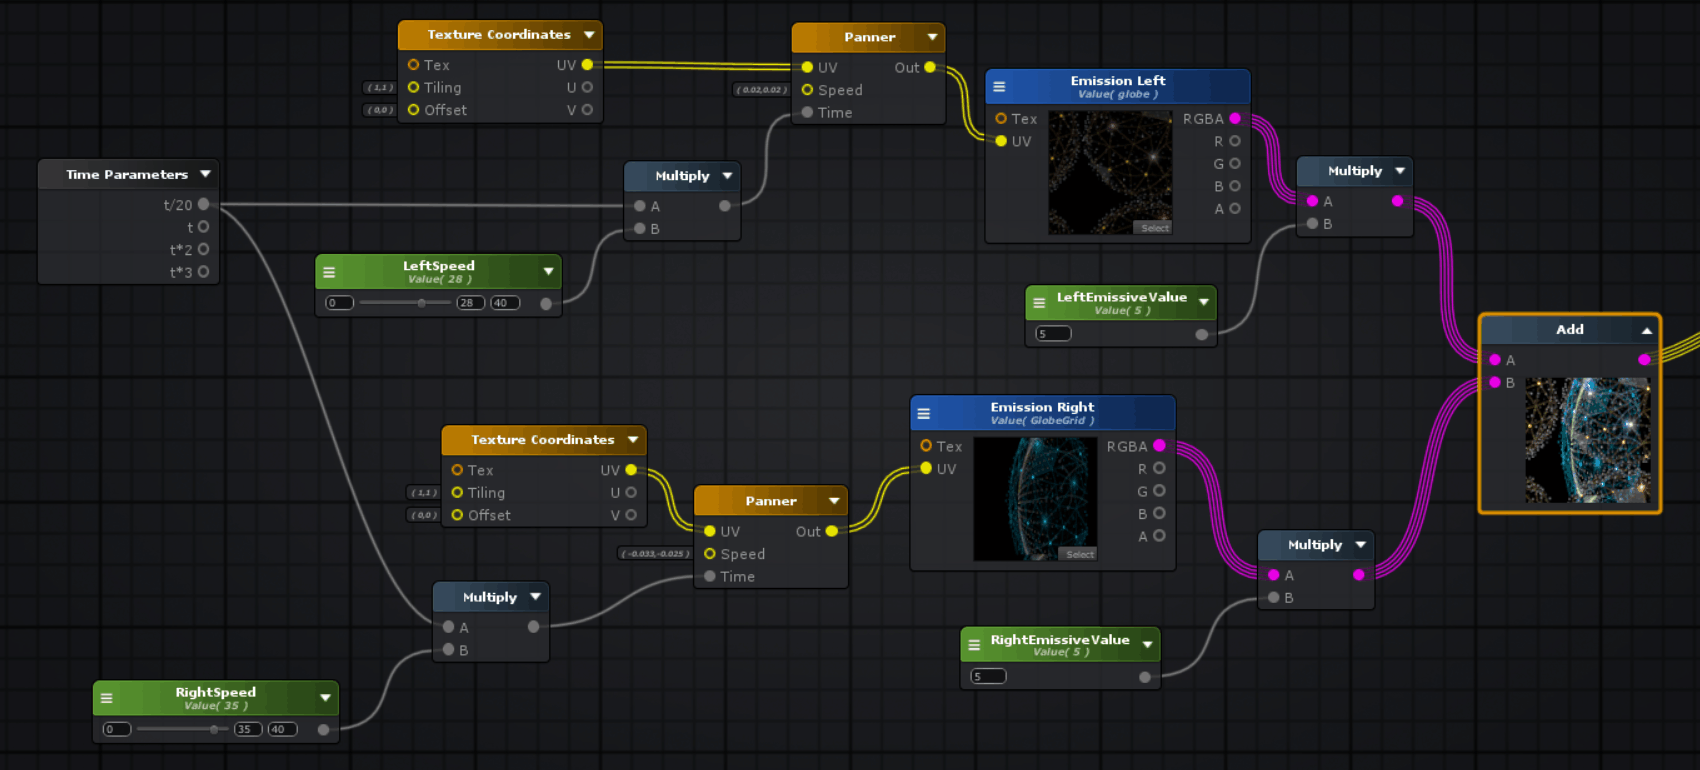
We then multiplied the moving textures with the Emission texture. Since its background is black, only the moving textures that are being masked by the globe grid will be retained. We then added the result to a toned down Emission so that there will always be a grid that is visible in the background. We just toned up the Emission Value to make it more apparent and connected it to the Emission node.
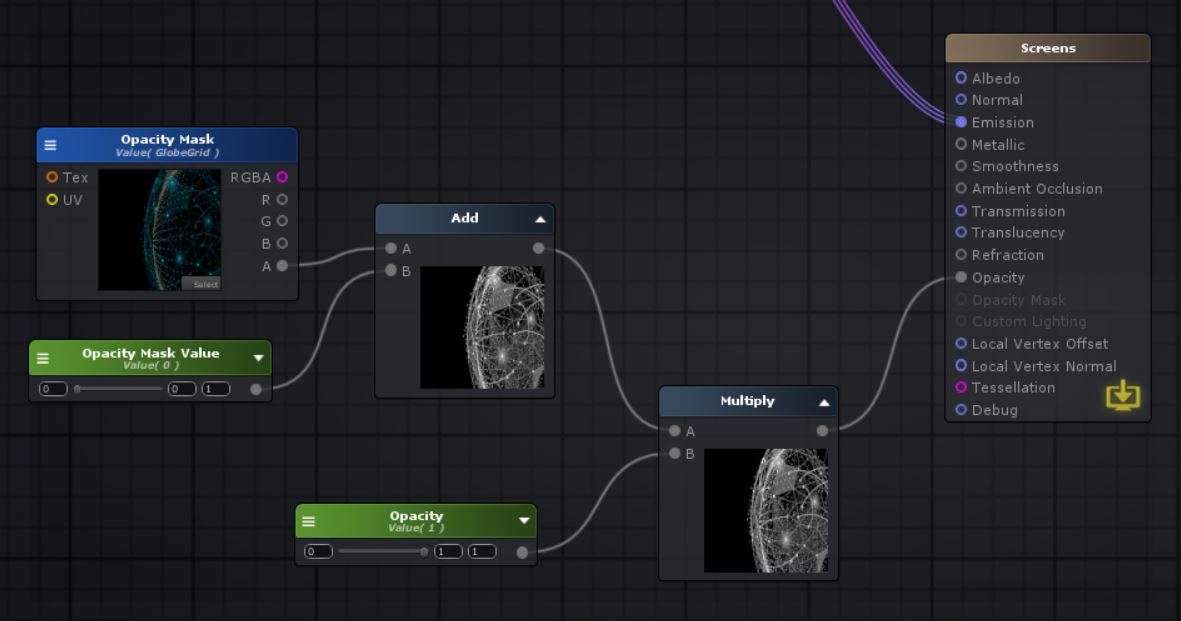
Then finally we added an option to control the opacity, but basically that’s it!
Material Editor Demo
Setting it up in Unity
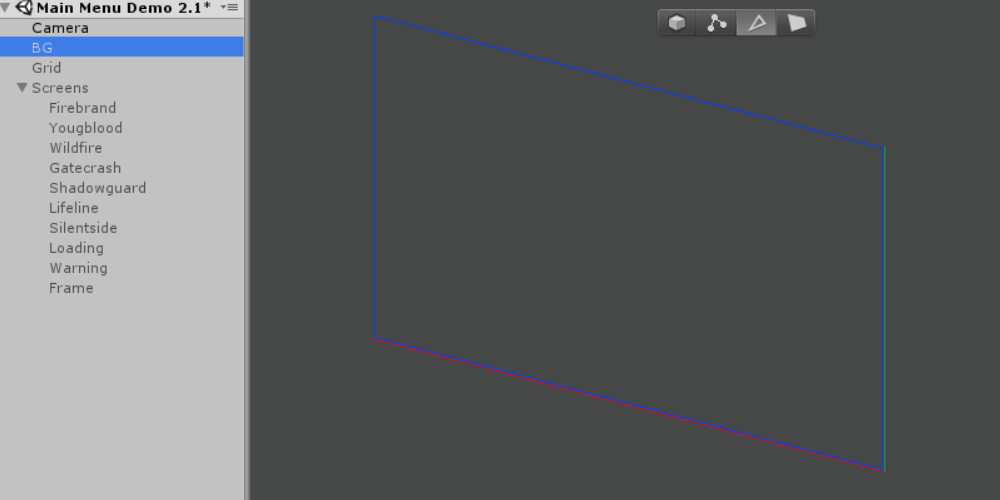
Since our view didn’t require any rotations, we opted to use a simple orthographic camera. All the images used were setup as billboard planes in the scene. We used ProBuilder shapes for easy editing of vertices to match the textures without any distortions, although regular Unity planes will also work just fine.
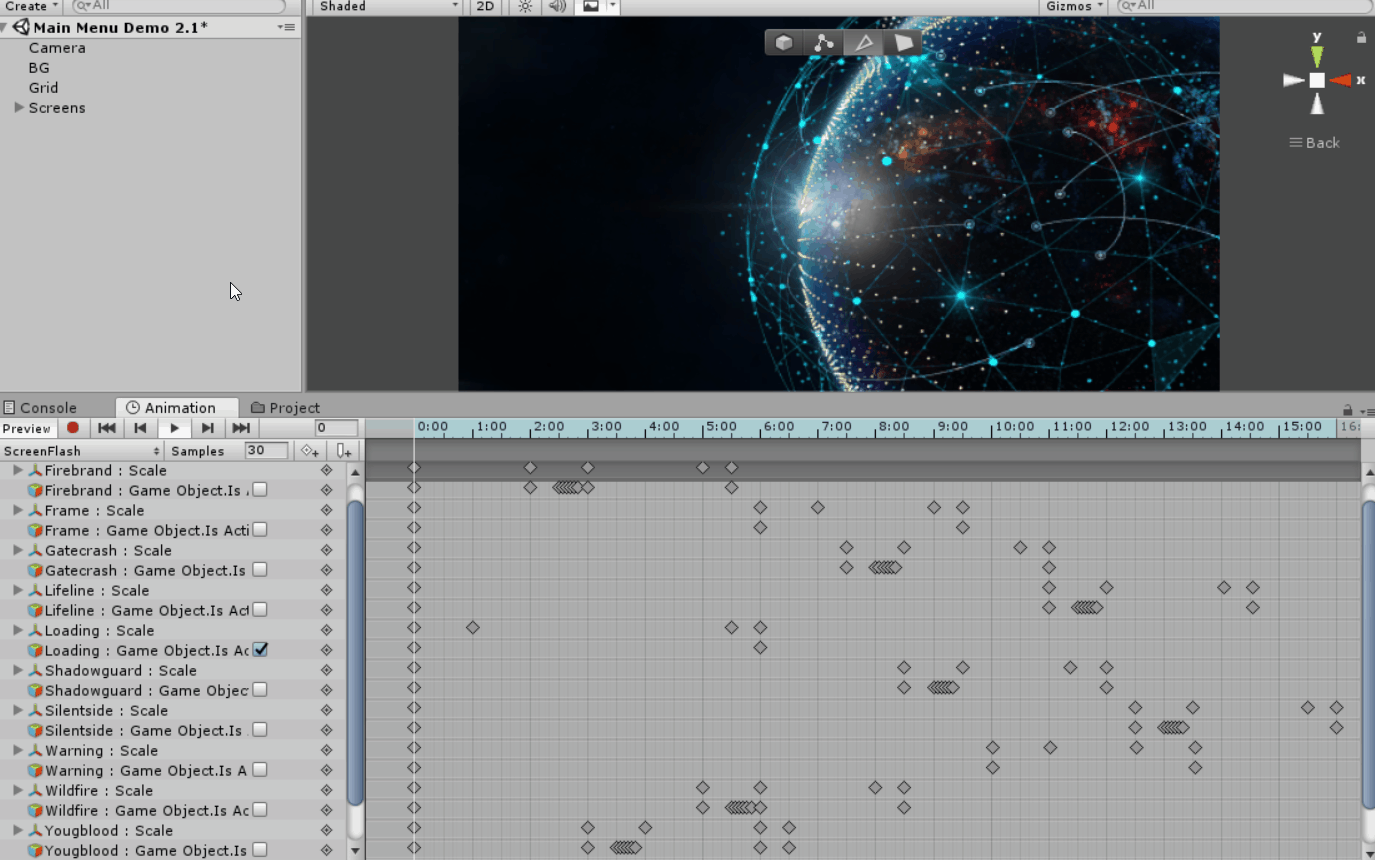
We then positioned the planes on the z-axis, with the furthest plane having a material with the background texture attached to it. All the other planes in front of it had the material with the custom shader effect we just made. We positioned them slightly in front of the Background Object so it will overlay correctly on top of it. Since they have the same texture resolution, this would align perfectly. Lastly, we created an empty Game Object (renamed to Screens) and placed all the planes that we will be animating to simulate various screens flashing on top of the globe.
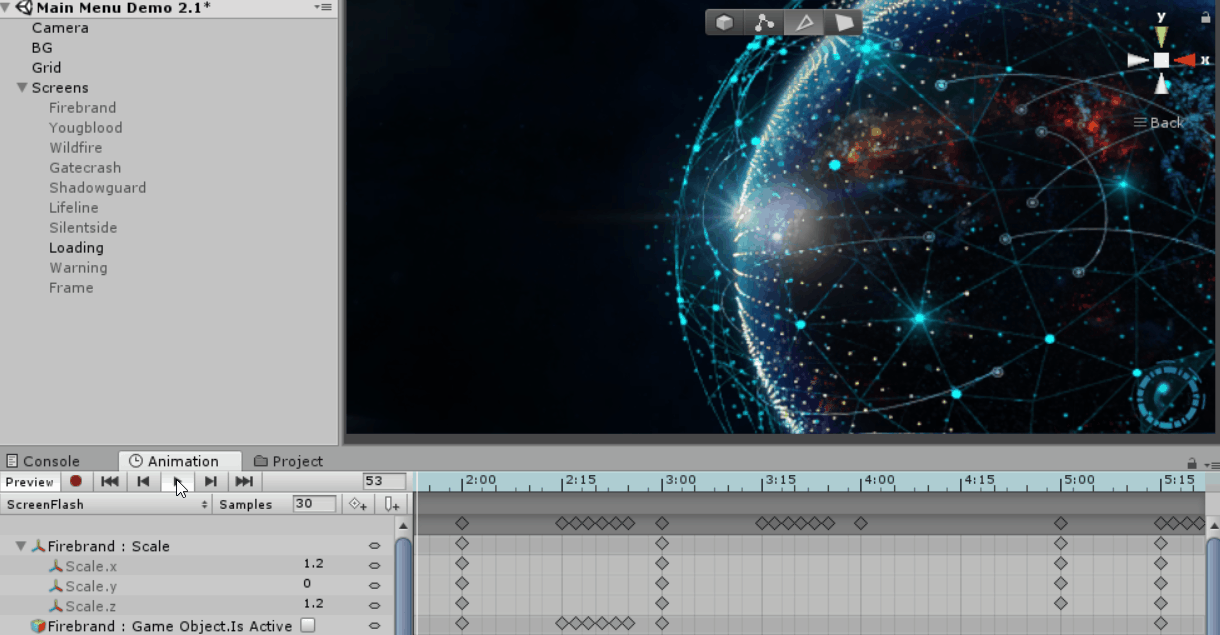
Animation
I added the animation component to the Screens parent so I can do all my animations in one location. It mostly just involves meticulous keyframing, timing and placement.
Flickering
Flickering of the screens was achieved by setting the Active property of the game objects on and off in quick intervals.
Ease In, Ease Out
To create this effect, we set the scale of the y value of the game objects to 0 and tweened it to the correct resolution and once we’re ready to ease it out, just tween it back to 0 and uncheck the game object’s active property once the animation is done. For the example below, we set the ease in to last for 1 second and the ease out to last .5 seconds.
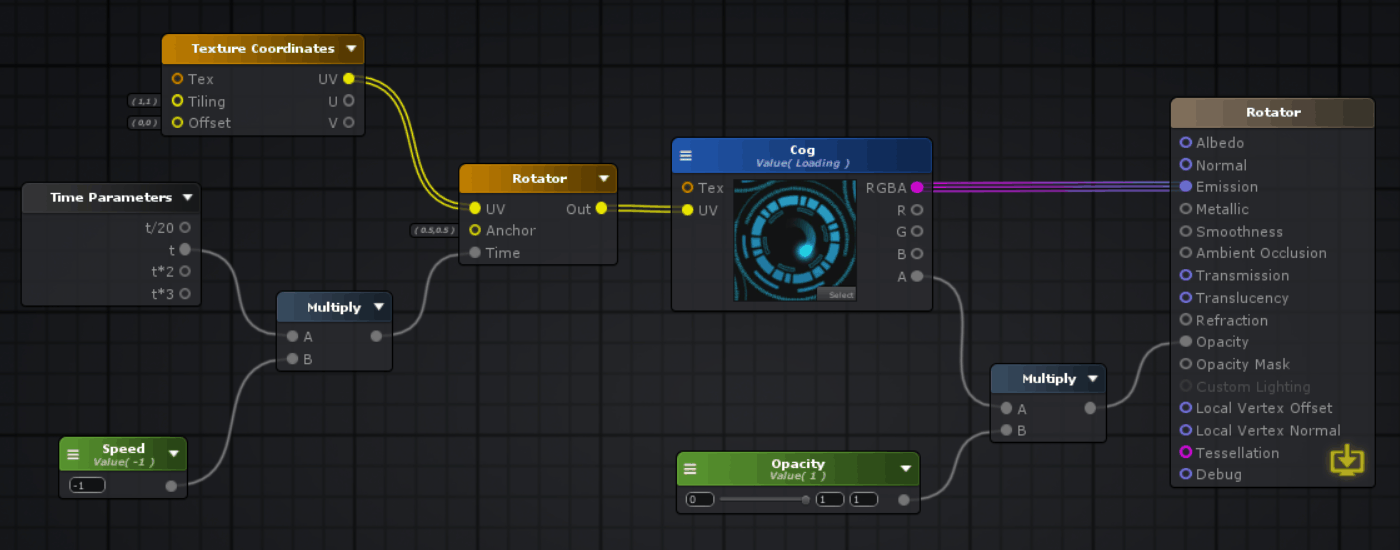
Rotation
We also created a shader that gives the ability to rotate textures so I used it for the Loading game object. It’s a simple shader that makes use of a Rotator node to rotate a texture. we just exposed a Speed property that could control how fast the rotation goes.
We did a lot of play tests to see if the timing and placements were all good. After that, we just adjusted the keyframes or scaled the length of the animations to see which combinations looked best.
Considerations and Final Thoughts
I think the animations would have been done quicker and more efficiently had we used Cinemachine instead of the Animation window. We could have just re-used the animation clips and scaled the time duration to give some variation, plus, the animation set up would have been cleaner and easier to adjust. However, we had to come up with this effect in just one day, so we went for a more straight forward process. We were also using an older version of Unity, where the Cinemachine add-on hasn’t been installed in the project during the time this was being made.
The Author

Karla has been working as a 3D Generalist for the past 12 years. Her achievements include being in the credits of Uncharted 2 and having created assets for EA Sports. She also digitally sculpted collectible figures for toy companies such as Neca and Icon Heroes. She is currently working as a Tech Artist(?) for Beyond Red Wave Arts, where for the past 2 years, she has been modelling and texturing props and characters, creating VFX, as well as doing level integration and lighting in Unity. Aside from being a 3D artist, she’s also a certified pole fitness instructor and enjoys other physical activities such as hiking and yoga during her free time.

